How to Install Garena: A Step-by-Step Guide - Based on my extensive experience managing gaming clients, I have outlined the 5 essential steps to correctly install the Garena platform. Following this structured approach ensures a stable environment for your gaming sessions.
Important Updates:
Garena Universal Maphack 6.2 download was released.
Garena Universal Maphack Video Tutorial watch how to use maphack.
STEP 1: Download Garena Game Client
Always obtain the installer from a verified source to ensure file integrity. Select a link to download from the list here.
STEP 2: Execution
Once the download is complete, locate the installer file. Click Run to open the file "Garena_setup.EXE". I recommend closing background applications before running the installer to prevent file access conflicts.

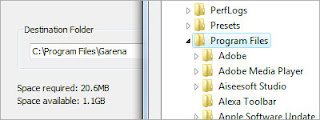
STEP 3: Game-Install Option
Choose the directory where Garena will be installed. While the default path is usually sufficient, ensure your chosen drive has adequate disk space for future game patches.
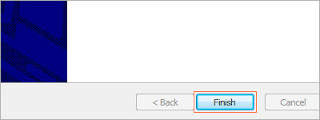
STEP 4: Installation Finalization
Press Finish to end the InstallShield Wizard. The installer will finalize the registry entries and file placement required for the client to function correctly.
STEP 5: Launch
Double-click on the Garena icon found on your desktop to launch the game. If the client fails to open, verify that your firewall is not blocking the application.

Updates:
Garena Universal Maphack 6.2 download was released.
Garena Universal Maphack Video Tutorial watch how to use maphack.
If you are facing difficulties in your installation, please verify your system meets these technical requirements:
- Windows 2000, Windows XP, Windows 2003, and Windows Vista but not Vista 64bit
- Internet Explorer 6 or higher
- Latest Flash Player
- Screen Resolution of 800x600 pixels or higher